- Fresh water tank capacity — the video says 125 gallons early on but 150 gallons in the closing summary. This doc currently says 125. Check the spec sheet from SLE Equipment.
- Fridge / freezer count — the video says "two sets, one on each side" and also "four double-door fridges and freezers". This doc currently says 2× per side / 4 total. Confirm physically.
Also worth checking on day-one:
- Confirm the exact grey-water dump fitting type (this doc says "3" hose fitting" — could be a cam-lock, bayonet, or threaded connector).
- Find and read the operations sticker inside the side-entry door. SLE installs a startup/shutdown/transit reference sticker — anyone working in the trailer should read it before first shift.
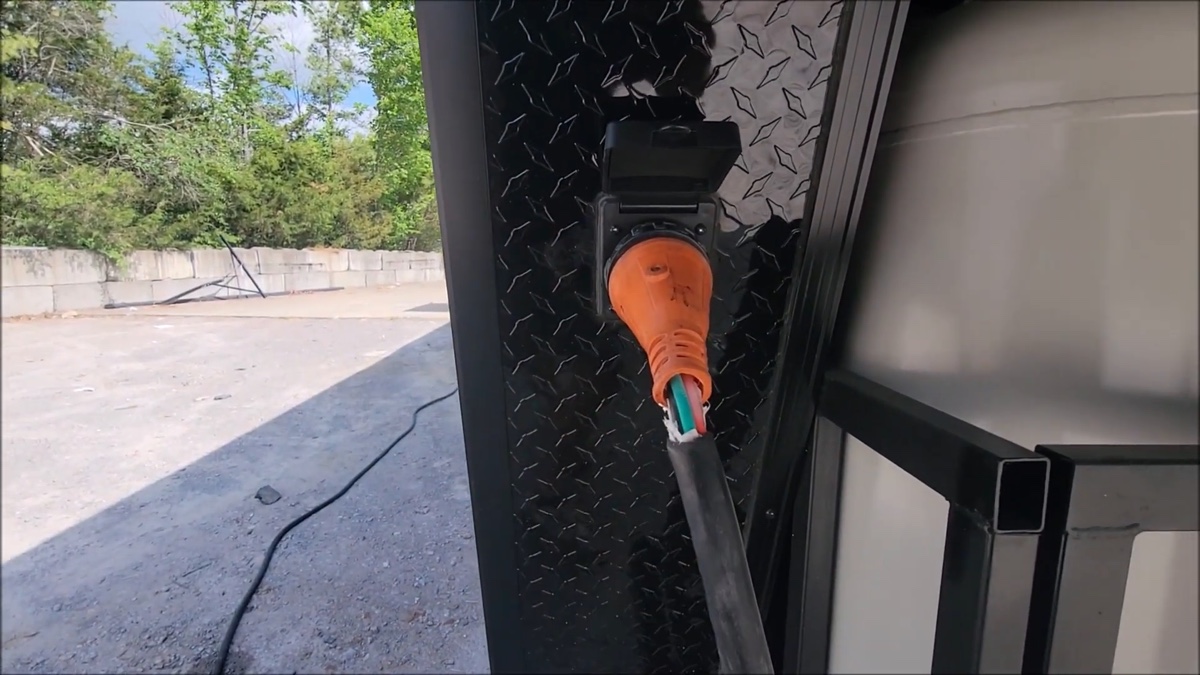
One 50 A plug on each side of the trailer at the nose. Each plug runs the equipment on its own side.
- Passenger side — runs the hood. Required for any cooking.
- Driver's side — runs the other half of the trailer.
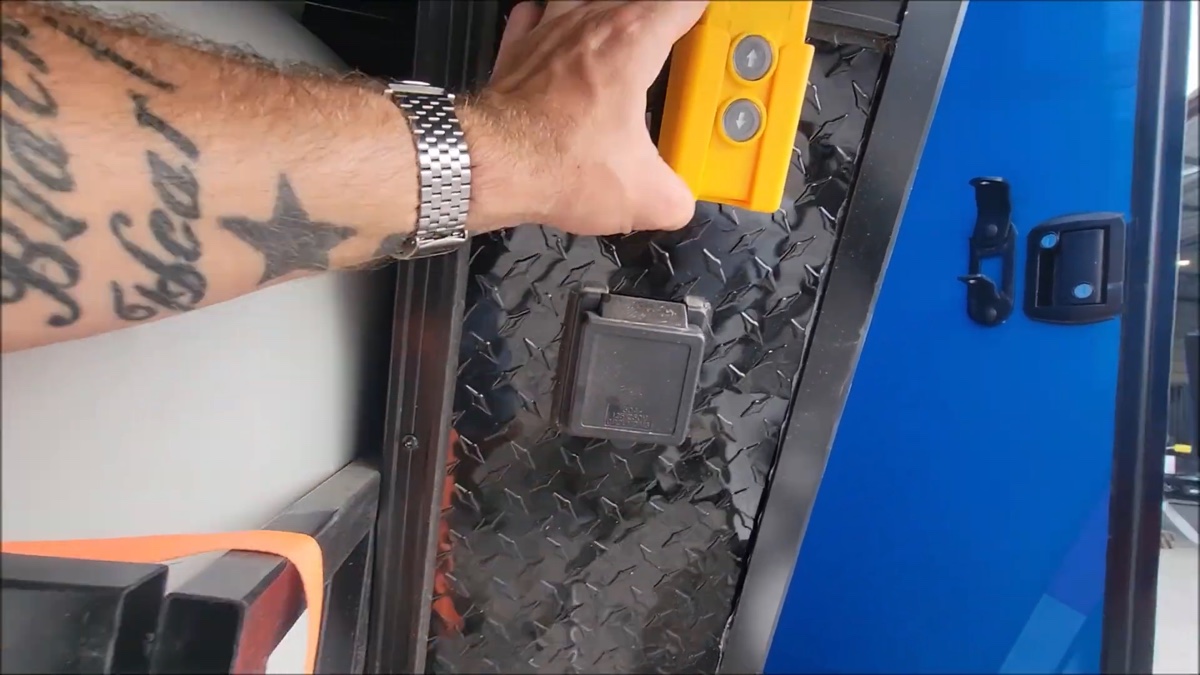
Above the driver-side plug: landing gear up/down controls. Battery + hydraulics for landing gear are in the access panel between the two propane cages.
Two generators can be stored up in the riser.
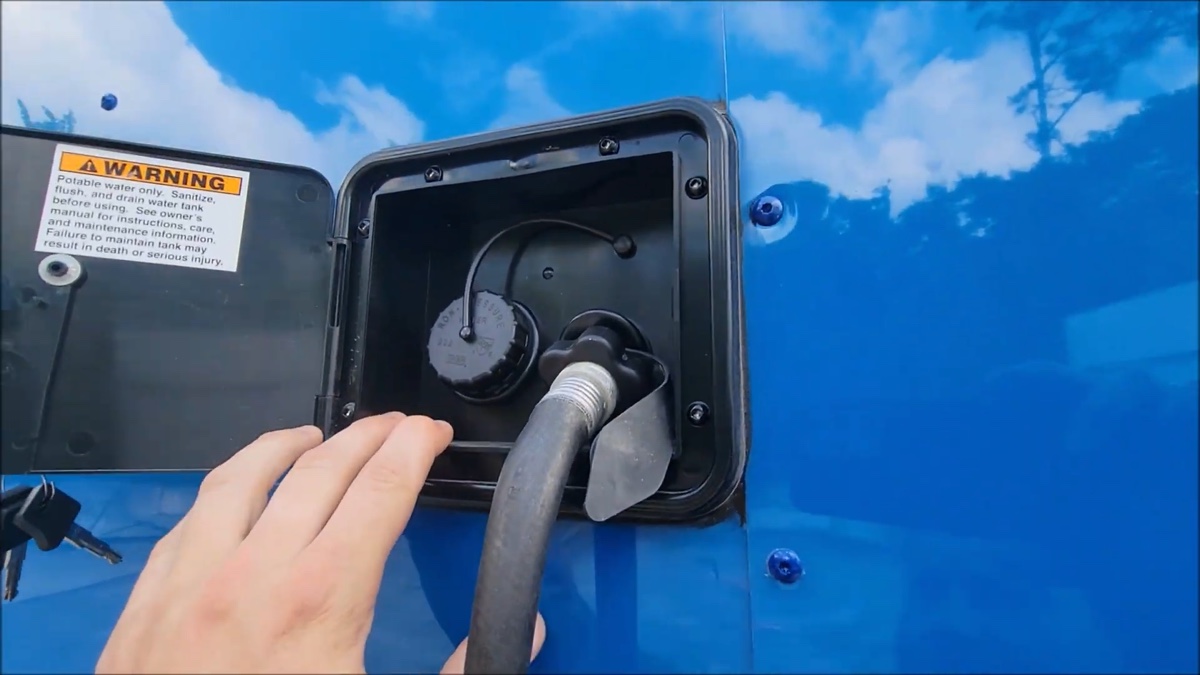
Box on the passenger-side riser, two ports inside (unlocks with key kept near the sink fixture):
- Right port — direct pressure. Thread a hose in and the event water feeds the faucets directly.
- Left port — fills the on-board fresh tanks.
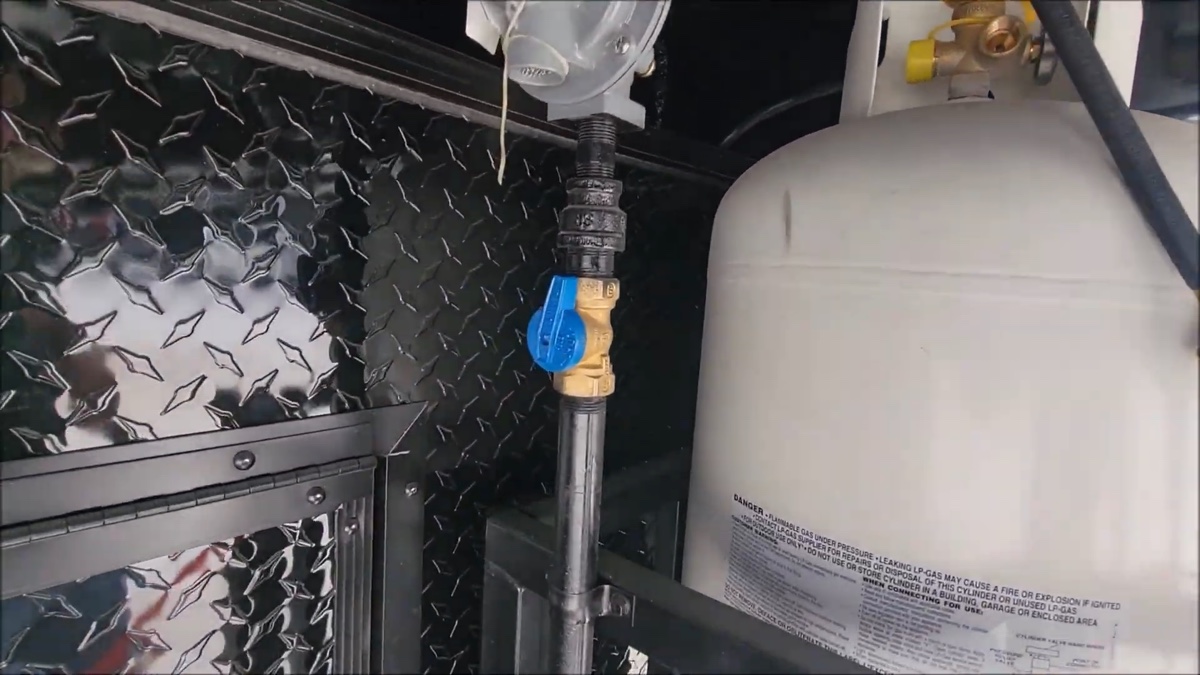
Each tank → pigtail → regulator → blue knob. The blue knob is in line with the line = ON; crossed/perpendicular = OFF.
Gas piping runs underneath the trailer per code — susceptible to scratches and dings. Inspect before each event.
Full startup procedure is in Startup. Do not turn gas on without doing the safety prep first.
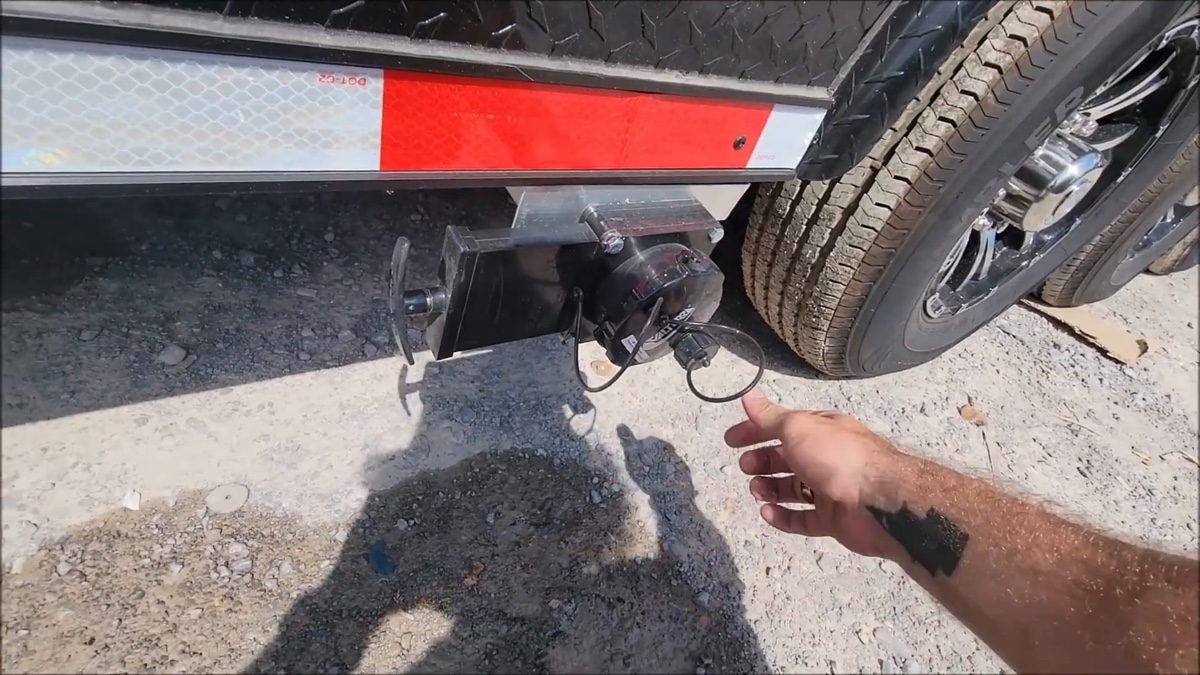
Spigot has two fittings:
- 3" hose fitting — standard RV/camper supply. Hook up → pull the lever out → drains.
- 1" garden hose thread — same procedure with a normal hose.
When done draining, push the lever back in.
- Connect power. Breaker/generator OFF. Plug in 50 A cable(s) — push in, twist right, tighten collar. Turn breaker/generator ON.
- Inside the trailer: turn the hood fan ON.
- Inside the trailer: plug in the carbon-monoxide reader and confirm it's running (it beeps periodically to show it's working — a different sound from the alarm).
- Open ventilation — concession window or back porch doors.
- Outside: open the propane tank valve (turn to OPEN).
- Outside: turn the blue knob in line with the line. You should hear an initial whoosh of gas filling the system.
- Wait 5–10 minutes outside. If the CO reader alarm goes off, you have a leak — shut everything down and call your local gas company.
- Once clear, step inside and light burners / griddle / oven as needed (see Equipment).
- Water: flip the water-pump switch on the face of the cabinet below the hand-wash sink.
- Hot water: on-demand heater thermostat is above the hand-wash sink — set temperature, watch for the small flame icon.
- Turn off all equipment knobs — burners, griddle, oven. Every knob to OFF.
- Outside: turn the blue knob out of line with the line.
- Outside: follow the pigtail to the tank and close the tank valve.
- Wait 5 minutes. Step back inside and visually confirm all pilots on burners and griddle have gone out.
- Turn off the hot-water heater — open the exterior cover, flip its switch to OFF. (See Equipment.)
- Turn off the water pump on the cabinet face.
- Power down: breaker/generator OFF first, then unplug 50 A cables (push in → twist left → pull out). Store cables in the riser.
Burners: standing pilot at the back of each — hold a barbecue lighter to the pilot, ignite. Repeat for all six. Adjust temperature with the knob.
Oven: pilot with igniter. Hold the red button down with one finger → press the spark button with the other → hold until pilot is lit. Temperature knob controls the oven. One divider tray inside.
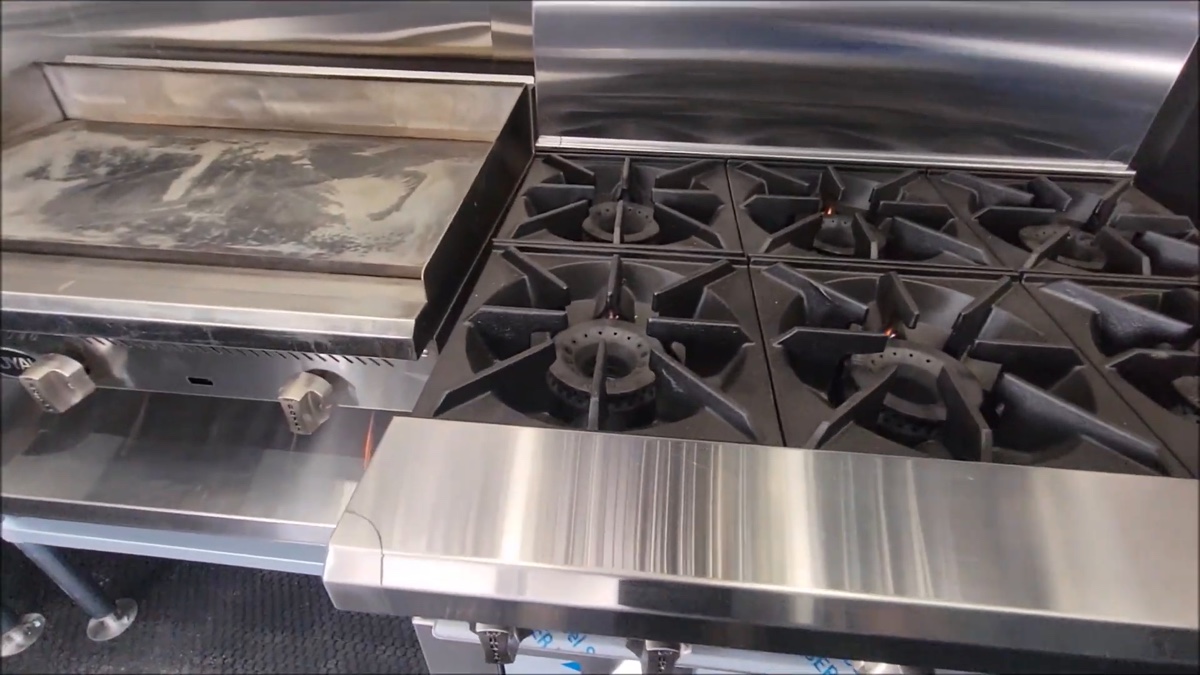
Each burner has a braided gas line running up to a small orifice underneath. Hold a barbecue lighter beside the orifice → click → hold until the pilot stays lit. Repeat for all three. Adjust temperature with the knob.
Grease catch pan lives under the griddle.

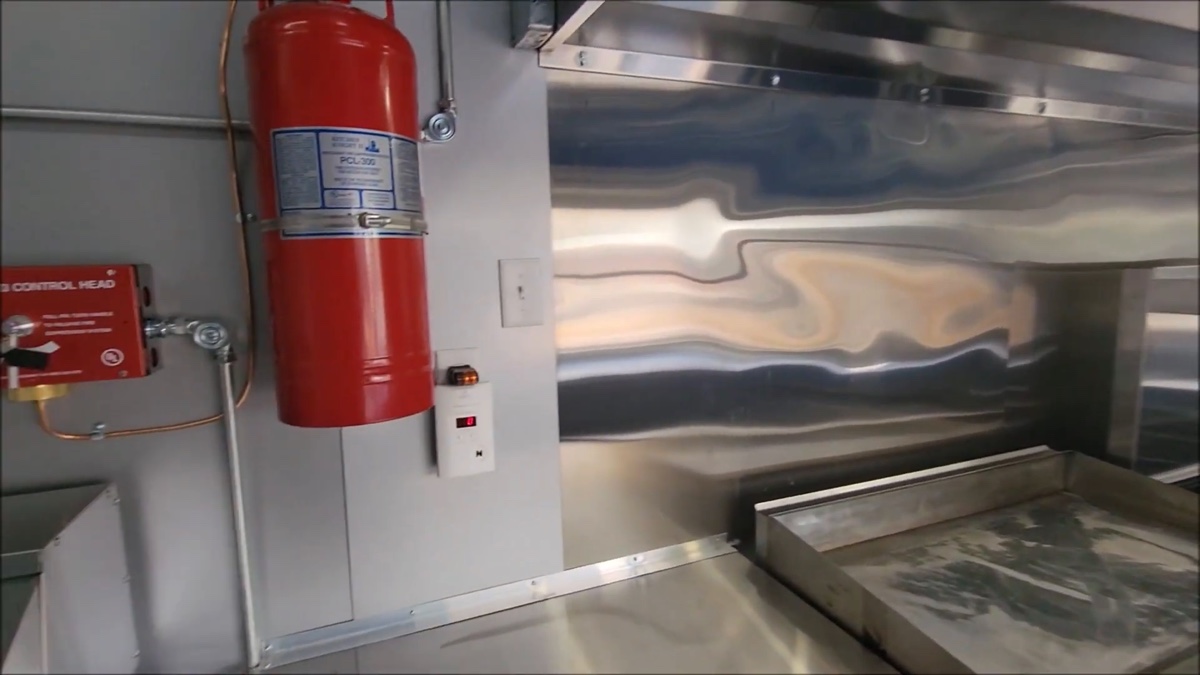
Hood switch is next to the fire-suppression tank, with three light settings. CO reader outlet is below it. Plug tester above shows two lights for a good circuit.
Suppression nozzles point at every cooking surface. To activate manually: pull the pin and yank the handle to the left.
Two fire extinguishers next to the sink as backup.
Thermostat is above the hand-wash sink (default 100°F). Small flame icon shows when heating.
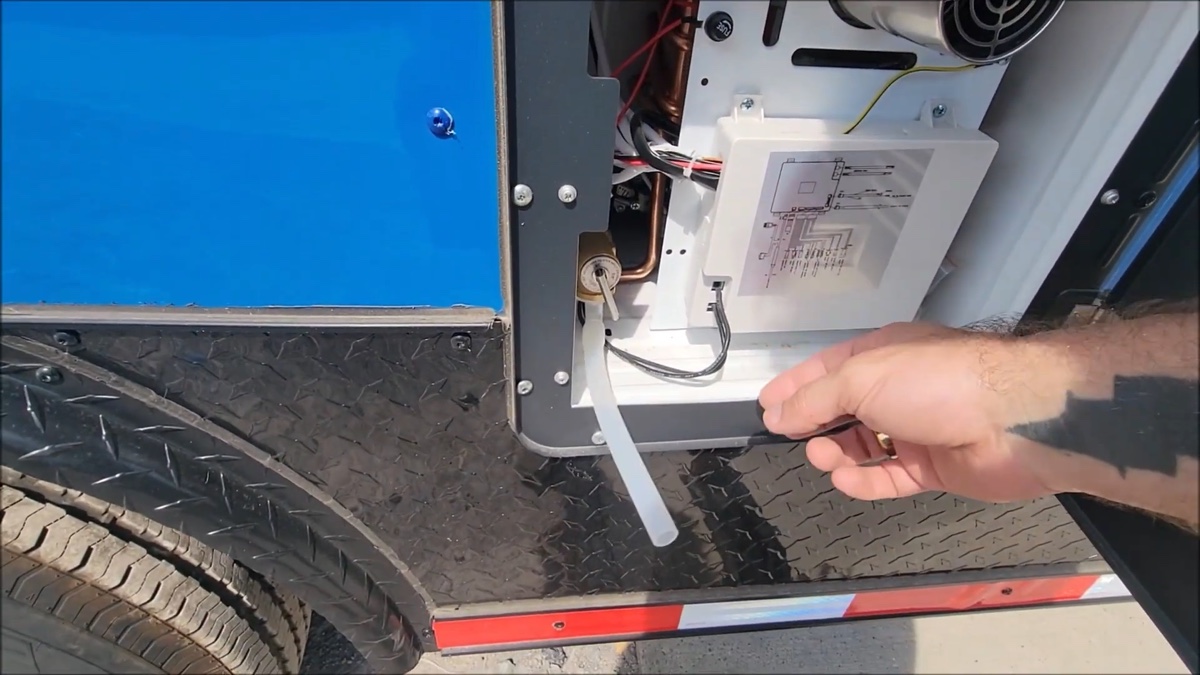
Exterior cover on the trailer side: ON/OFF switch + rubber drain hose for weatherizing. Toggle the switch every use — ON when running, OFF when not.
- 2× double-door fridge/freezer per side (4 total)
- 27" sandwich prep + prep table
- Perfume cabinet + green storage rack
- 3-bay sink + hand-wash station
- Mop sink (just inside side entry door)
- Concession window with pop-up counter + POS table beneath
- Large 4-door locking cabinet above sink/concession window
- 3 AC units, 6 LED strip lights inside
Gull-wing doors on all 3 sides (rear + both sides). Side-entry door on the driver's side. 2 outlets + 2 LED lights inside porch; 2 more outlets on the inner wall. Roller wheels on the back floor.
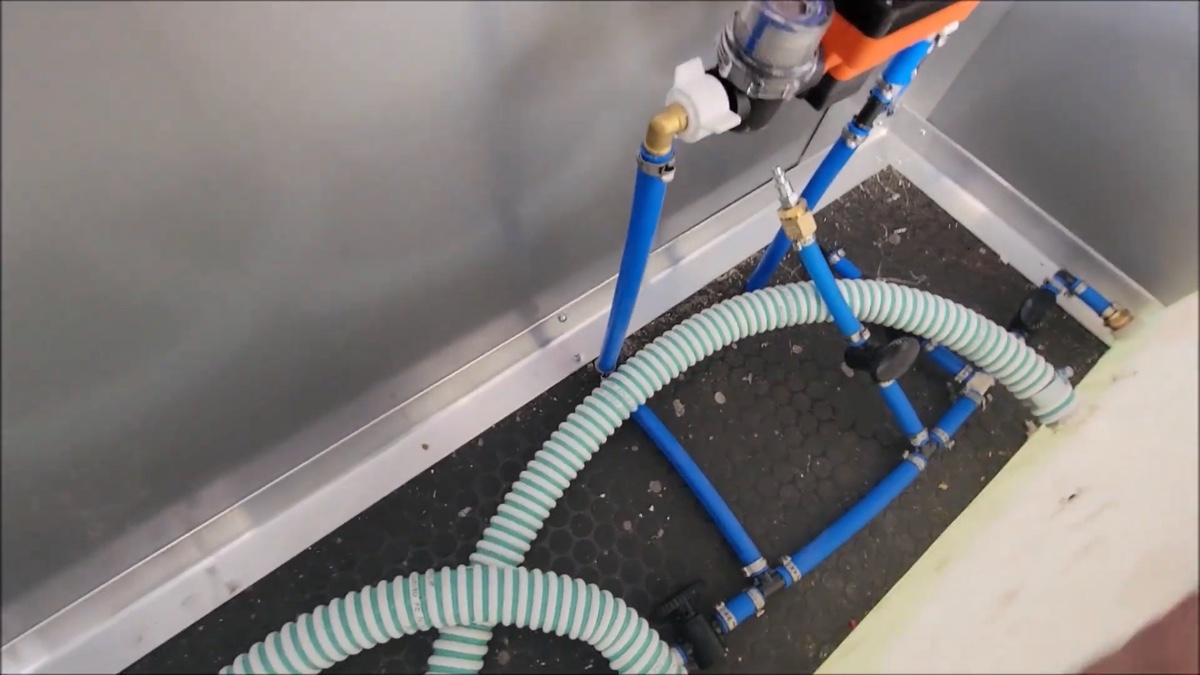
Required if temperatures will drop below freezing or the trailer is being stored. Plumbing is at the front and the sink is at the back, so the lines are long — run the air compressor several times.
- Open the riser hatch on the passenger side — water tanks, pump, breaker panels, inverters, and fuse panel are inside.
- Drain the tanks: open the drain knob (in line with the line). Drain as much as you can. Close the drain knob.
- Close the tank shut-off knobs — 2 per tank, all out of line with the line. If you skip this, compressor air just fills the tanks instead of clearing the lines.
- Inside the trailer: open both hot and cold faucets.
- Outside: connect air compressor to the air nozzle, set below 30 PSI. Open the pressure-regulator knob slowly to push air through the lines.
- Run an 18-gallon tank's worth of compressed air through at least 5–6 times to clear moisture from the long runs.
- Open the exterior cover.
- Let the rubber drain hose dangle outside the trailer.
- Pull the drain tab — the heater empties.
- Store the hose back inside the cover when done.
- Flip the heater switch OFF.
- All equipment knobs OFF
- Blue knob OUT of line
- Tank valves CLOSED
- Wait 5 minutes — confirm all pilots dead
- Hot-water heater switch OFF
- Water pump OFF
- Power cables unplugged and stored in riser
- Concession window + porch doors closed and latched
- Landing gear up
Shut blue knob OUT of line → close tank valve → evacuate trailer → ventilate → call local gas company. Do not relight until cleared.
First: two fire extinguishers next to the sink.
If they fail or panic sets in: pull the pin on the fire-suppression tank and yank the handle to the LEFT. Suppression nozzles cover every cooking surface.
Periodic beep = functioning, normal.
Continuous alarm = leak. Treat as emergency.
Initial whoosh is normal. Continuous = leak. Shut everything down per the gas-leak procedure above.
SLE Equipment — Nashville, TN
Contact: Chris (provided the walkthrough video this doc is based on).
Trailer ships empty — propane tanks must be filled locally before first use.